centovacast Setup Guide
Apr 02, 2020
First You Need To Signup A Service With Us, It Can Be A Paid Or Test Server
01 Login to centova cast
Go to Your Billing Area my.yesstreaming.com
select your available server ,
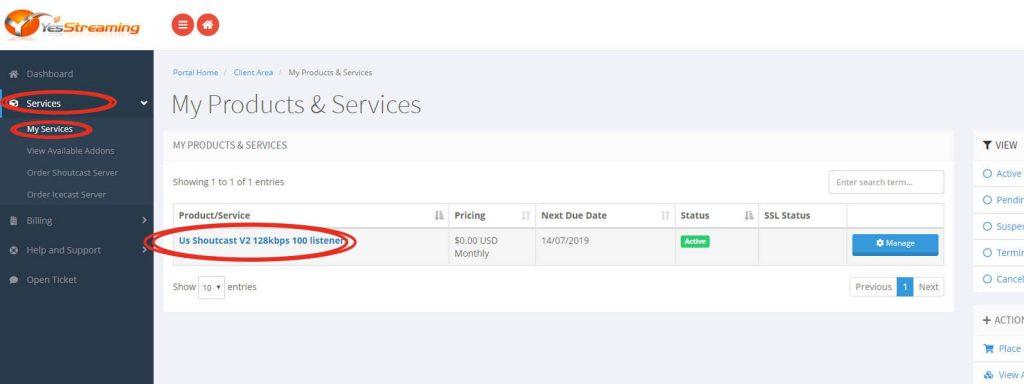
Now click on log in to centova cast.
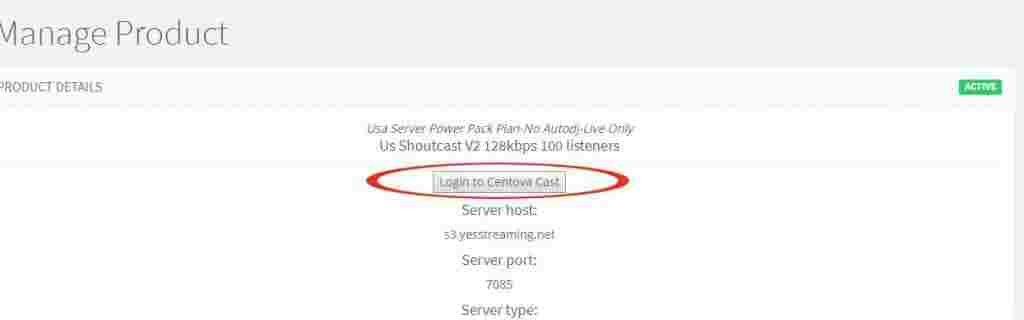
This will automatically redirect to your centova panel
02 Get Ready
To Start A online Radio You need Good Quality Mp3s. .
Please maintain a same volume level with all your mp3s .you can use Mp3Gain tool to do that
There Are 3 Types Of Streaming Service Methods You Can Get From Our Servers
A . Autodj Stand Alone
upload all your mp3 s to our server and run 24*365 , you don’t need to run a PC all the time.
B. Live Streaming + Audio dj
Run your live shows on selected hours only, you need a pc for the live broadcast time only
C. Live Streaming Only
Live from a studio, you need to run a pc or hardware encoder 24×365 days
A.1 Autodj StandAlone
2.A.1. Stop the Server

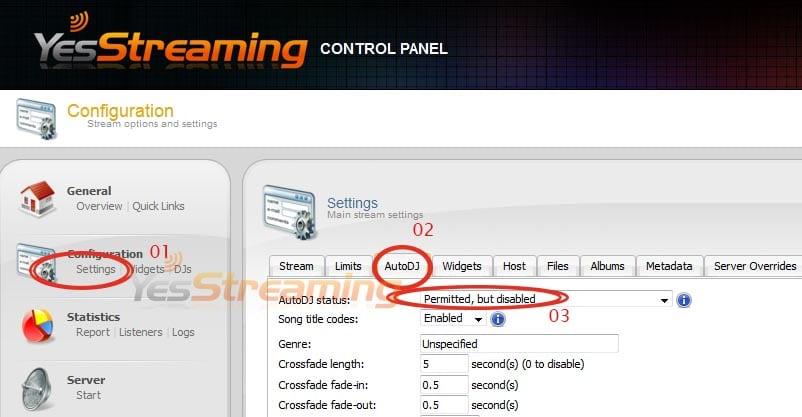
2.A.2. Set the server to your Time Zone, **see settings Menu
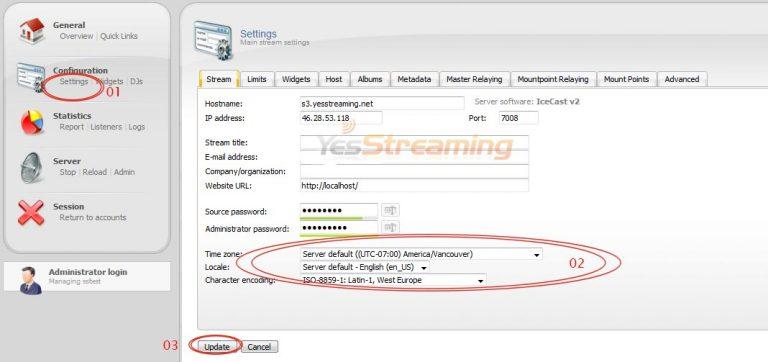
2.A.3.In settings click on Autodj tab , enable and Update
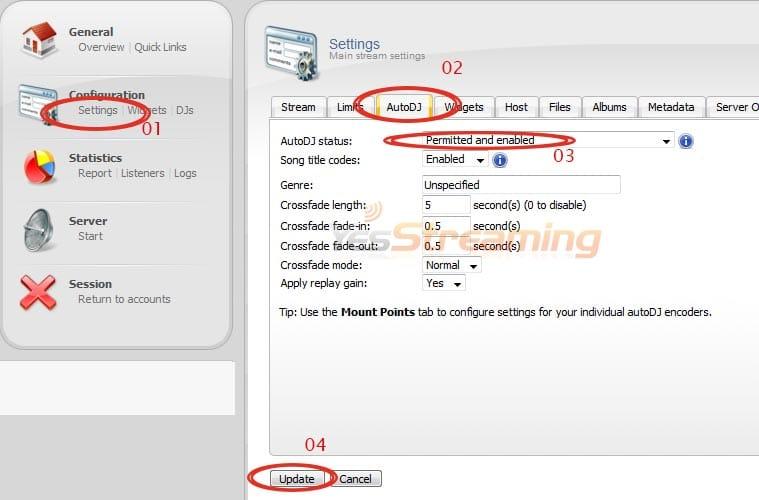
2.A.4. Refresh your browser
2.A.5. Now you can see a new Menu “Autodj ”
2.A.6. Click on “files”
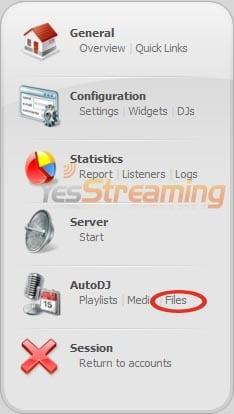
2.A.7. Select Media “Folder”

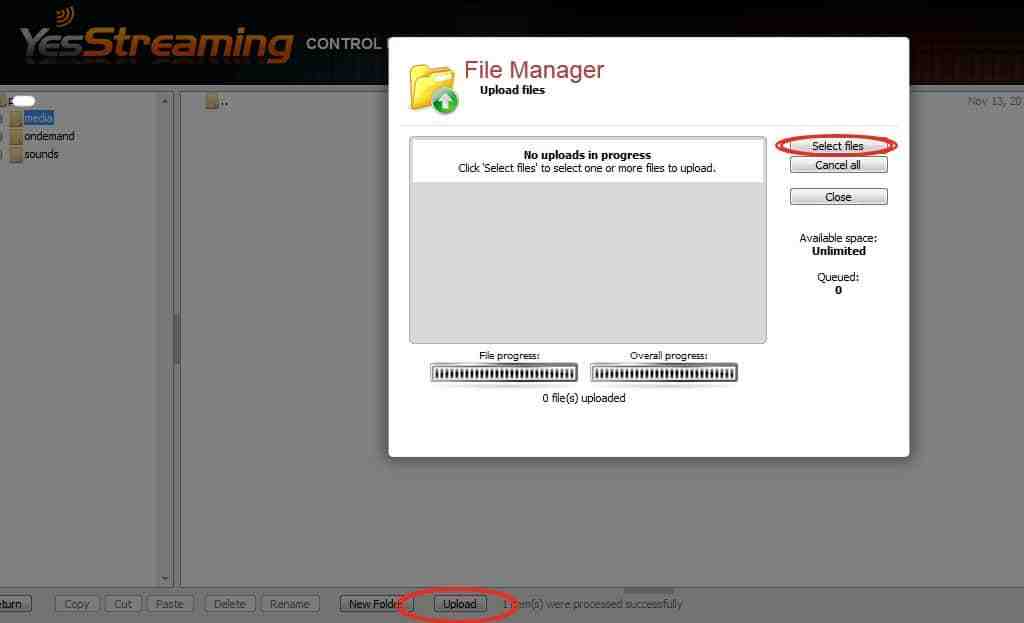
****Upload all your mp3s to autodj ***media folder only .
You can create sub folders inside the media folder ***** For Example Rock,,,80s.
2.A.8. Upload your songs
2.A.9. Return to main Menu
2.A.10. Select Media menu in Autodj
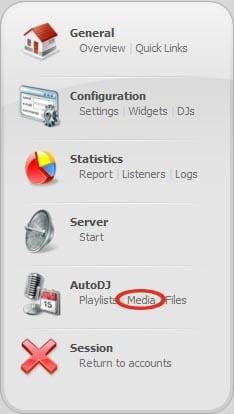
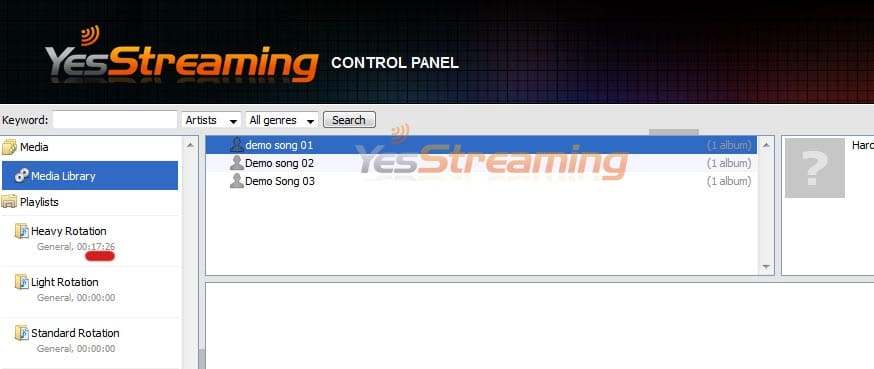
2.A.11. You Will See 3 Playlists In The Left , Songs You Uploaded In The Right
Heavy Rotation
Light Rotation
Standard Rotation
*** Do Not Delete This Rotations,Add Some Songs To One Of This Playlists .
2.A.12. Simply Drag And Drop your songs to a playlist
2.A.13. Return
2.A.14. Start your Server

Congratulations !!! Your Radio Is On Air Now
Note * if there is no songs added to the playlist Sever will not start
Your can create many playlists as you like and schedule it
You can Skip to 3 if you are not using other options
__________________________________________________________________________________________________________________________________________________
B.1 Autodj + live streaming
.B.1. Complete the AutoDj Setup and Start your Server .See 2.a.1
.B.2. To Start live streaming you need an Encoder and a Audio Playout system .mic. mixer board
***Download Latest Butt Encoder or you can use your Available Encoder or Hardware encode
B.3. Remember When Autodj is enabled you must use a shoutcast v1 encoder for icecast and shoutcast
B.4. Go to Quick Links

B.5. See the encoder settings with Autodj
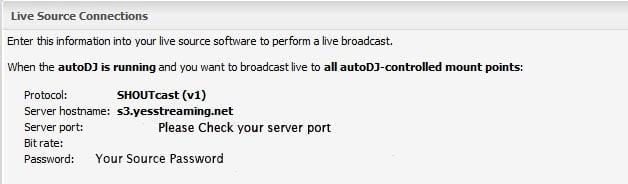
B.6. you must use the new port as described in the quick links
B.7. Use source password from settings Menu
B.8. Now start your Pc live encoder this will automatically override Autodj
*******If you stop your encoder. listeners can listen to your Autodj
Skip to .3 for Tune-in Links
________________________________________________________________________________
C.1 live streaming only
To Start live streaming you need an Encoder and a Audio Playout system .mic. mixer board
***Download Latest Butt Encoder or you can use your Available Encoder or Hardware encoder
C.1. Stop your server

C.2. In setting Autodj tab make sure Autodj is off
C.3. Update
C.4. Start

C.5.Now Setup Your Encoder
You can Find your Encoder Settings Under Live Source Connections in Quicklinks
When the autoDJ is not running or you want to broadcast live to a non-autoDJ mount point:

C.6 Start Encoder
____________________________________________________
03 . Where Can I Find My Station Tune-In Links
3.1. Go To Quick Links Menu
3.2. There you can see all your links
____________________________________________________
04. How To Integrate The Web Player To my Website
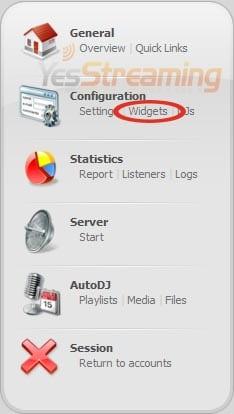
4.1. Click on Widget
4.2. Html Player Generator
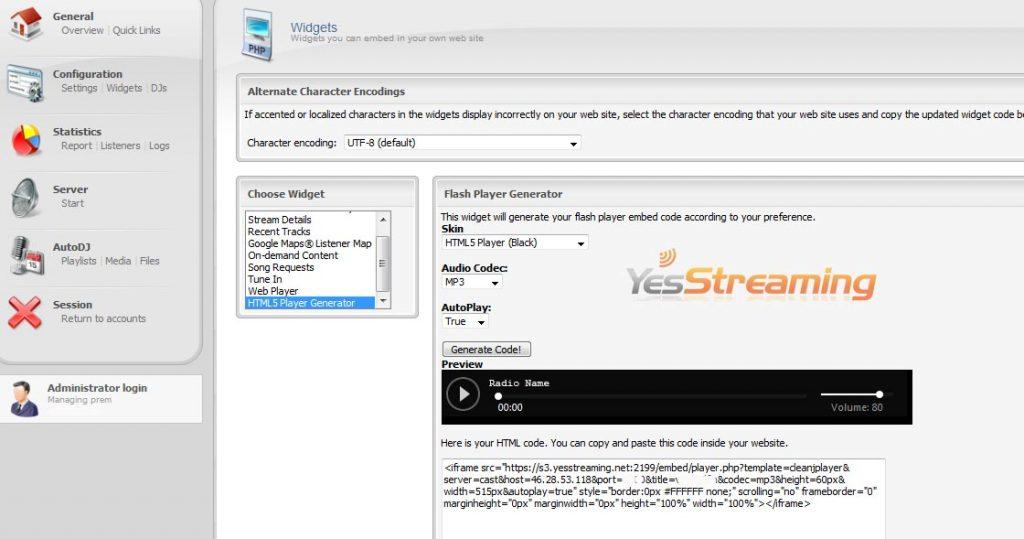
4.3. Copy the code to your web